Deploy applications on Kubernetes cluster with Rancher
KaaS is available for our customers on the whitesky.cloud BV platform. We relied on integration with Rancher to achieve easily deployable and manageable clusters.
In this tutorial, we will go through a step-by-step guide on how to deploy Kubernetes clusters and install containerized applications with Rancher in whitesky.cloud BV portal.
Rancher integration with whitesky.cloud BV
Rancher Kubernetes Engine (RKE) automates your Kubernetes operations and takes away the complexity of deploying and managing your infrastructure.
Our integration lets you seamlessly deploy all the components of the Kubernetes management environment in whitesky.cloud BV portal. At the same time, you stay in control of the configuration and the physical locations of the workloads.
Via an extensive set of API calls or the Rancher dashboard, you can install and manage your containerized applications in an automated way, expose them publicly and add persistent storage with a single click.
Pre-requisites to deploy Rancher management cluster
- Active customer. Containerspaces are created under a current customer and can be accessed only by the customer’s admins. Make sure your IAM user is an admin of your current customer.
- Cloudspace where Rancher workers will be provisioned.
- A DNS record to securely access your Rancher UI dashboard. (Optional)
Deploying Rancher management cluster
- Open Containerspaces from the navigation drawer.
- Click CREATE MANAGEMENT CLUSTER in the top bar. A management cluster creation wizard will appear.
- Enter the following cluster information and click NEXT:
- Name of the cluster.
- Cloudspace where RKE nodes should be provisioned.
- External IP address that will be used to publicly access RKE dashboard. The external IP of the linked cloudspace is used by default.
- Add your domain configuration and click NEXT. Choose one of the options:
- Create new domain. Add a sub domain under one of the top level domains registered for your customer. This will automatically create a DNS record for your subdomain. See DNS documentation for more information on DNS feature.
- Your own domain. Provide a domain name previously registered in a registrar of your choice.
- Configure an SSL certificate for your domain. Choose one of the options:
- Select Let's Encrypt checkbox to request an SSL certificate from Let's Encrypt.
- Clear Let's Encrypt checkbox to use your own certificate. SSL certificates can be added by the Customer admins under Admin > Certificates > Add Certificate.
- Click CREATE. A dialog window will open to confirm that the Rancher management cluster is being deployed. You can follow the deployment logs published on the portal.
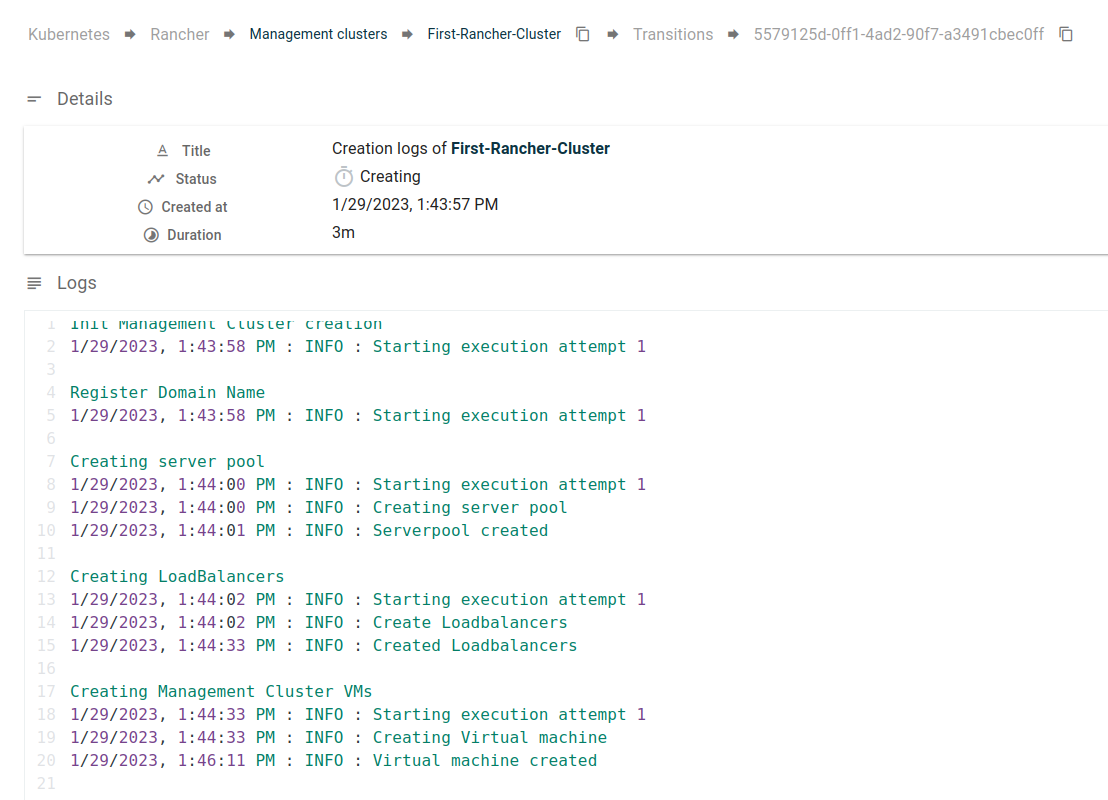
Now when the configuration is completed, you can proceed with deploying your RKE cluster. The process will take a few minutes, as it includes creating:
- Server-pools
- Load-balancers
- Deploying VMs with RKE and Rancher installed.
You can check all the created components on your cloudspace details page.
Rancher management cluster details page
Open the details page of your new Rancher management cluster under containerspaces. You can find your cluster information including:
- Kubernetes clusters. List the Kubernetes clusters created within your Rancher management cluster.
- Cluster nodes. List all the VM nodes used within your management cluster.
- Provisioned nodes. List all the master and worker nodes in your management cluster.
- Kube config. The configuration file of your Rancher management cluster, that you can copy and paste into your favorite Kubernetes client.
Accessing your Rancher management cluster
Use one of the following options to access and manage your Rancher management cluster:
- Rancher UI. Use the domain of the Rancher management cluster to navigate to the Rancher dashboard. You can log in with your usual IAM account.
- Kubernetes IDE. Download kube config file from the Rancher details page in the portal to access your cluster via
kubectlor a Kubernetes IDE of your preference. - Portal UI. Navigate to the Rancher cluster details page in the portal. Here you can manage Kubernetes clusters and cluster nodes.
- Portal API/CLI. To automate your processes, you can manage Rancher cluster via API calls or CLI tool. Check portal.whitesky.cloud/api/1 for the complete list of APIs. Check CLI documentation for more information about the CLI tool.
Creating Kubernetes cluster in Rancher
To create a Kubernetes cluster in rancher with the whitesky.cloud BV portal UI, do the following:
- Go to Containerspaces page and click on the name of your management cluster to open its details page.
- Click CREATE KUBERNETES CLUSTER at the top bar.
-
Enter your Master and Worker node pools information and click NEXT.
- For Name, enter the name of your Master/Worker node.
- For Cloudspace, select from the dropdown a cloudspace where you want to deploy VMs for the node pools.
- For Memory, specify the amount of memory for Master/Worker VMs.
- For vCPUs, specify the number of virtual CPUs for Master/Worker VMs.
- For Node Count, specify the size of your node pool.
Note: You can deploy each node pool in a separate cloudspace. If the cloudspaces that you select belong to different locations, you can deploy a Georedundant Kubernetes cluster. This is only possible if your customer has access to multiple locations.
Note: Cloudspaces that belong to different locations must be connected.
-
To connect multiple cloudspaces, go to Cloudspace Details Page > Connected Cloudspaces > Connect To Remote Cloudspace. See cloudspaces documentation to learn more.
-
Assuming that we have 3 cloudspaces, you must make sure that all of them are connected in order to avoid any routing issues (e.g CS1 is connected to CS2 and CS3, plus CS2 is connected to CS3). The same concept applies for cases with more than 3 cloudspaces.
-
Enter your cluster name and click CREATE.
Rancher management cluster allows you to monitor the provisioning process. Once the process is finished, you can notice that the status of your Kubernetes cluster is changed from Provisioning to Active and the machine pools are changed to Running.
If you check your Kubernetes cluster details page, you can find the master and worker nodes deployed with the status Active.
When whitesky.cloud BV notices that the Kubernetes cluster has finished deploying, it will automatically install the following components:
- The whitesky.cloud BV CSI driver for automating PV provisioning.
- Cert manager for automating TLS certificate handling.
- Nginx ingress controllers for each worker node pool.
Once the cluster is deployed, you can manage it from the Rancher dashboard or your locally installed client.
You need to check the status of your services on your Kubernetes cluster before deploying your application:
- Access the dashboard of your cluster.
- At the top bar, you can find a drop-down menu that allows you to choose the scope of your project.
- Select portal-whitesky-cloud-system.
- From the left navigation drawer, select Service Discovery then select Services.
- Make sure that all of your services including your load-balancers services are in status
active.
Note: You will usually need to wait a couple of minutes after creating your Kubernetes cluster to ensure that all the services are prepared and running normally.
Deploy applications to Kubernetes cluster
Pre-requisites
Prepare a domain name on which the WordPress application should become available. For the DNS IP, you must use the IP address of the load-balancer that is deployed in front of your worker nodes. You can find this IP address under Cloudspace > Ingress > Load-Balancers.
Deploying WordPress application
- Open your Rancher dashboard.
- Click Apps on the left navigation drawer, where you can see an extensive list of Helm Charts to choose from.
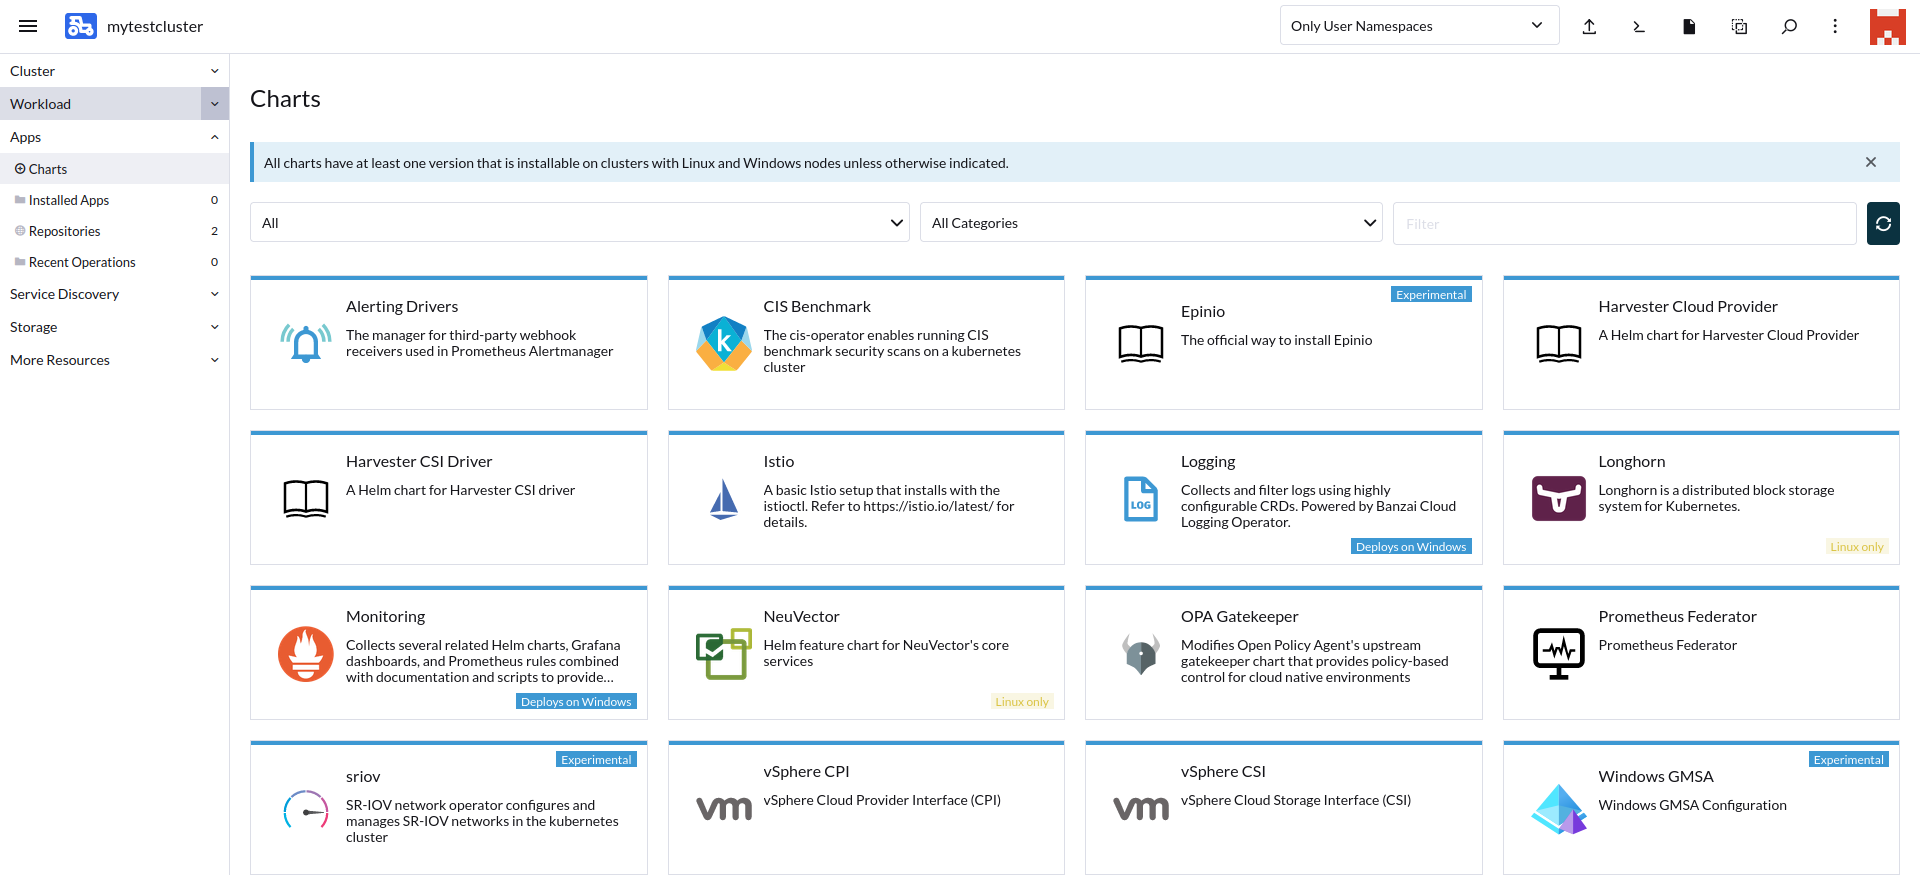
- Search for the desired application; in our case, it’s WordPress.
- Click Install, then on the screen of Metadata click Next.
-
Edit the WordPress server YAML file with your values.
-
Update the following parameters under ingress section In the WordPress YAML:
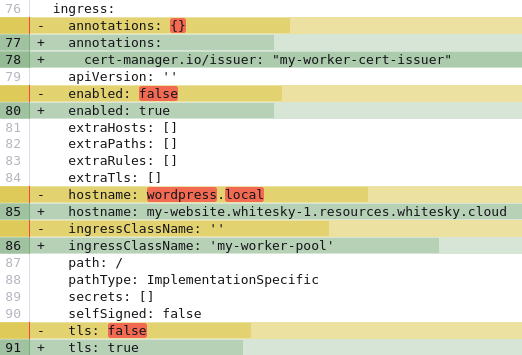
Paramater Description annotations Points to the cert-manager of your cluster by its name. You can find the cert-manager of your cluster under More Resources > Cert Manager > Issuers. enabled A Boolean flag that indicates whether ingress should be enabled. hostname Contains the domain name of the application. ingressClassName Referes to the Ingress class name. You can find it under More Resources > Networking > IngressClasses. type Specifies the service type. Set to ClusterIP for Ingress type. With the help of ingress, your WordPress application will be publicly accessible. You will need to have a hostname to be used by your website. whitesky.cloud BV DNS feature comes to solve this for you, where you can create a new domain name for your application on the portal and use it in your YAML configuration file.
-
-
Click install and wait until the installation process is finished.
You will notice that the application is trying to find a persistent volume because WordPress applications need MariaDB and MariaDB requires a persistent volume.
After the volume is created, a communication channel is opened between the CSI drivers that are installed automatically on your Kubernetes cluster and the whitesky.cloud BV APIs to create and attach disks to the correct VM that includes the pods.
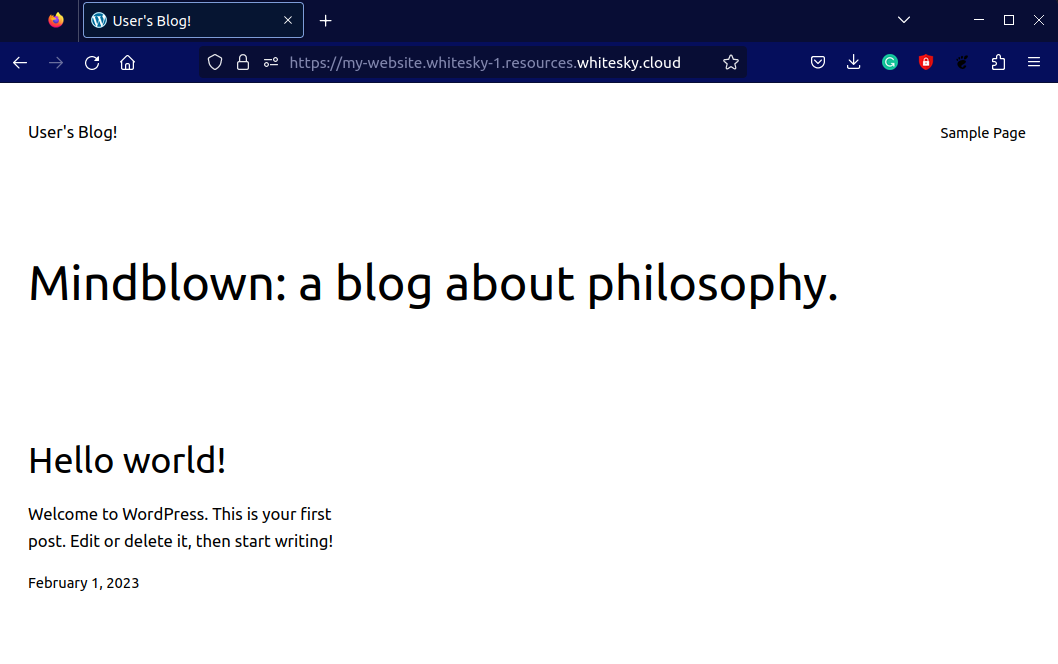
You can test your setup by navigating to the domain of your WordPress application.